Showing posts with label DIY. Show all posts

2.14.2012

valentine print!


I made this little printable for my Mr & I am adding it to a 5x7 frame:D Thought I would share it for those with significant others who don't want you to buy them anything but you LOVE to give or do something sweet for them! Enjoy! And I hope you have a Happy Valentine's Day filled with lots of love & happiness!


...until next blog!

2.09.2012

2.01.2012

...words to live by in the bathroom!

Our playroom bathroom has been in a stand-off with me for almost a year now! I had a few decor items, but nothing that said, "welcome to our bathroom, we aren't boring people I promise!" So finally I got the motivation to spruce it up & finally give in & add some stuff! Which brought me to make this little printable... I have been seeing some really cute printables out there & wanted to make one to fit ours...so here it is, enjoy!!!


Until next blog...

1.23.2012

count them 1 by 1...

Being an avid pinner on pinterest, I am almost inspired on a daily basis! Sometimes I just wish I could stop life & recreate all the things I want to recreate! But I have to do things as time allows...Here's a little something I made! I plan on printing it out on some card-stock & framing it for the playroom..or playroom bathroom. You can too! Sorry I am not a savvy upload file, yada-yada-ya person, but you could just right click & save image as & print from home! Enjoy!!! And if you do print it out, put in a frame, & place it in your beautiful home, email me a pic & I'll post it in the blog! {outofthetiffanyblue@gmail.com}


Until next blog... 

12.01.2011

it's 11.11, make a WISH!

You're invited....
to take a peek at our daughter's first birthday! She was born on 11.11 & with her turning 1 on 11.11.11, we knew we had to make it extra special! So I decided early on with a Make a Wish theme.

Here are a few of the details... (all photography is courtesy of jenny.lynn photography, message me for her info!)
Step 1: Invitations [photo below]
Have you ever envisioned something & set out to find it, but you come up empty handed? Yup, you guessed it...that happened to me in the invitation department! I thought it would be cute to have star wand invites...out of ALL the invitation places (online, etsy, & around town), I pretty much came up empty handed. And I just wasn't finding anything that I had envisioned. Then I decided, well I will just buy star shaped invitations, embellish them, & turn them into wands! Eeehhnt, WRONG! You can find lobster claws and even tequila bottles (complete with mustaches)- shaped invitations, but NOT stars! ((now that I've made this claim, they will all of a sudden appear e v e r y where like magic!)) So last resort to fulfill your vision? Call in the brother-in-law to draw the stars on a computer for you, you come up with the wording, & take them to Office Depot to print them....and yes, hand cut them allllll out :D Thank goodness for family! {wish for mommy= GRANTED!}


Step 2: Decor [photo below]
decor=glittery, stars, girlie...wishes!
1) made a ribbon garland! Super easy (time consuming, but easy!) just sewed (with thread that was my memaw's!) misc. ribbons/trims to a 6ft piece of pom-pom trim! Then bought an empty frame in the "custom" framing department at Hobby Lobby (a little tip, they sell mess-ups from people who placed an order & weren't happy or decided on something else etc!) then my wonderful mr spray painted it for me! Then I just painted a wood #1 (craft section, yes @HL) & hung it in the center! {wish for a cute backdrop for her cake smash & double as cute party decor in general (plus a keepsake I will add to her big girl room some day..) = GRANTED!}

2a) inside the china cabinet: I removed all of our china off of the middle shelf & replaced it with everything from when she was born...all of her firsts: hat, shirt, bow, blanket, pacifier, bracelets, etc...a collage frame with pics from our maternity shoot, as well as a photo from her newborn shoot & a large picture of one of her announcements & her going home outfit. I ended up liking the way it turned out so much, that I haven't brought myself to take it all out yet! 
2b)make a wish banner...would LOVE to take credit for it, but unfortunately the invitations took a little more out of me then I expected, so I ordered it off of etsy! From Little Pumpkin Papers, SUPER, SUPER cute things & I was able to do a custom order! Which I also got

3) wish tree: tags from too! I customized a star tag she already offered & decided to use them for Alivia's Wish Tree. I had it set up on a table with pens & asked guests to "make a wish" for Alivia! I thought it would be a perfect keepsake & absolutely love the personal touch it adds. In fact, afterwards, we decided this will be one of our traditions. A wish tree every year for birthdays. {traditions started = wish come true!}

4) this pic gives you a little glimpse of it all together! The centerpiece at the front of the pic was handmade by her Nana's best friend, Lana's Lullaby Cakes & Cards, she is one crafty, talented, & amazingly awesome lady!


Step 3: More Decor...[photo below]
1) another find in the HL custom frame department & another awesome spray paint job by my mr! My inspiration started here on Pinterest. I was discussing things with my (soon to be) sister-in-law "SNL", how cute I thought it would be to do 1 picture from every month! So we did it! I'm a little biased but I think it turned out perfect! It seemed to be a big hit too! Everyone enjoyed getting to see how much she had changed & grown from 0-1!

2) birthday girl dress: I kept going over & over what will she wear for her birthday...I knew a tutu outfit was last resort because (yet again!) I envisioned something different. But this time, I didn't exactly know what I had envisioned. And actually I have to be honest, I ordered this dress before I even knew/planned on using it for her birthday! I sent a pic of it to my best & asked for her opinion...it's great to bounce ideas off of people, especially ones who will be honest with you & it always helps me to come up with even more ideas when I say it out loud or even just send it in a text! So I sent it to her & then all of a sudden it needed a belt & a headband & BAM, birthday outfit had been born! SNL & I went off on an excursion to Joann's to find the fabrics for the flowers/ rosettes! SNL did an amazing job on it too I might add! She even added small broach-like buttons from my wedding shoes to her belt & one to her headband! Another personal touch that I adore! {wish for personal touches= SUCCESS!}

3) some of the table decor...bought two little glass jars+glitter+tags 1)first birthday 2)wishes + painted a chipboard #1 = part of the table decor

4) birthday wreath: found a star at the party supply store+painted an A from HL+tied it on with ribbon= TaDa Little A Wreath (already had the tiffany blue door ;D)


Step 4: Cake & Cuppycake Decor [photo below]
1) Cake for ALL! (1 tier white+1 tier chocolate= all cake lovers covered)
2) Cuppycake for ONE!


Step 5: CAKE smash SMEAR!! [photo below]
1) smash cake apron: designed/made by her Aunt (SNL)! We picked the fabrics out at Joann's. Turned out AAAAAA-dorable & she looked so cute in it with her little bloomers & cake headband!

2) cake headband from a local gift shop+custom cake banner+ONE giant cuppycake= One happy Little A. She is such a little texture person...always has been from when she was even teeny-tiny. Always wanting to touch everything...so naturally she LOVED squishing, smearing, sharing, throwing, slinging, & nibbling here-and-there on that giant cuppycake!

3) just SOME of the cake smearing damage! BUT well worth it! {wish for memories to be made= without a doubt!}


Step 6: First Birthday Memories [photo below]
1) I had THE best time envisioning, planning, & throwing this First Birthday Party! I couldn't have asked for a better memory for our daughter. I can't wait for her to look back when she is older & see just how special she has ALWAYS been to us, even from the very beginning. I realize that when they are this young, "they aren't even going to remember", but the pictures will show her, all of the wishes people wrote for her will tell her, & all of the lifelong keepsakes will let her know that she is our little wish come true!


{the wording to the right of the picture is what I personally came up with for her invitation! I thought it was just perfect & seemed to just come to me so I stuck with it! amazing how one very special birthDATE can inspire a whole theme!}

I couldn't have done any of this without my amazing mr...all of her grandparents...all of her aunts & uncle...the best...all of our family & friends...and especially our little wish come true, little a herself! I could never thank everyone enough!!!

Until next blog...

<center><a href="http://www.bloghopseveryday.com" target="_blank"><img src="http://i1197.photobucket.com/albums/aa429/mommyssweetthings/Blog%20Hops%20Everday/BlogHopsEverydayFridayBlogHopButton.png" border="0" alt="Blog Hops Everyday Friday Blog Hop" /></a></center>

11.28.2011

deck the [kitchen] window!

As if you couldn't tell, I really love Christmas time... & all of the decorating is just a bonus! I decided to share a short little post about some other Christmas decor I've done around the house lately. This one is in our kitchen window. I promise two things about this...1) it is beyond easy-peasy & 2) you can do it on the C H E A P! Really, I promise!!

The basics...all you need is 1}a tension rod (purchased mine at walmart for like $3 or $4) 2} ribbon in any color you wish! (purchased from Joann's, left over from little a's birthday party) 3}ornaments (pink striped ones are from hobby lobby & the teal sparkly ones are from walmart)

So there you have it, you can do it in a SNAP & on the CHEAP!


Until next blog...

11.21.2011

...i must confess!

So I must say that I have always been one to enjoy each holiday...and have always tried to not rush through them! I even might say that I have said once or twice "I can't believe they already have the Christmas stuff up!" while shopping in stores. But for some reason...I must confess! I couldn't wait any longer & have started decorating for Christmas! Yes before my rule of waiting for the day after Thanksgiving! I just LOVE decorating...especially for Christmas! It's not that I don't appreciate Thanksgiving & all of its glory of leaves, pumpkins, turkey's, & pilgrims, but let's face it..there are only so many girly decorating options with Thanksgiving. So while I am SO Thankful for Thanksgiving & can't wait to celebrate it with my family. I just couldn't wait to get the ball rolling on Christmas decorating this past weekend!


Now enter Exhibit A...Little A to be exact :D Here is Little A's Christmas tree in her room::


I went in a very girly direction for her room, but also added personal little touches that represent her! I found little music note ornaments for her love of piano music...the only thing that will stop her dead in her tracks & cause her to pay attention for 2.5 seconds in time! Then there is a giant glittery bow shaped ornament...to represent all the countless bows mommy tries, tries, tries to keep on her :) even though she insists on eventually ripping it off! I also included a star ornament, which represented her birthday party theme this year (11.11 wishes). Then one of my favorites is a glass ballerina...and although she is too little for dance at this age (she just turned 1!) she insists on walking only on her tippy-toes, which calls for everyone who witnesses it to say "awe she is going to be a little ballerina!" Then the last ornament that isn't just for decorating the tree, but holds a special representation, is the two keys...because she simply is the key to mommy & daddy's heart!


So there you have it! Proof that I am guilty of decorating before Thanksgiving...but can you honestly tell me you haven't started or even thought about decorating for Christmas yet!!?


Until next blog...

8.30.2011

something old into something {tiffany} blue

A few months ago some friends called my husband to see if he could come help load and haul away their china cabinet. They had decided they didn't want it anymore and were going to send it to goodwill. So off he went to help. I remember thinking after he left, "hmm I can't remember what it looks like? I wonder if it's something we could use?" Literally in the next few minutes I got a text from my hubby, "are you interested in this?" (I had been saying on this blank wall across from the dining table, I either wanted to find a china cabinet or have a built-in that kind of looked like one.) So he sent me two pictures of it and I told him, just bring it home, we could paint it and if we still don't like it, we can just continue it on to its destination.


He got it home and we decided we could paint it....yes, tiffany blue. I took my recipe box lid with me to lowes to match the paint. We lightly sanded it (nothing too serious), dusted it off and then just started painting it. Now I don't know for sure, but I think because we didn't heavily sand it, the paint didn't go on very "solid" at all. We took a step back and it looked like it was done on purpose, kind of distressed. So we ran with it...we painted the whole thing, one coat, let it dry and that was it. We loved the finished product. I do still wrestle with do I want to switch the knobs, change out the bottom cabinet doors & line the inside with fabric/paper, but for the most part I am very pleased with it!


You never know what something can look like unless you just go for it! What's the worst that can happen? a) You either have to redo it and keep trying until you get it to look how you want or b) you send it on to someone else who will like it and/or do something else with it. You have nothing to lose!
So always oblige to help move something away, look on craigslist, or stop by that garage sale, you never know what you can end up with and re-create! You just might be able to turn something old into something {tiffany} blue! (or white, black, pink, green...whatever color your little heart desires!)


Until next blog...

8.18.2011

[pley-room]

When we bought our home, we were expecting our first baby and we knew that a baby does not stay a baby long therefore she was going to need somewhere to play! We envisioned doing an addition. Phase 1:remodeling the original house. Phase 2:the addition. Phase 3:the deck. Phase 1 was complete before we moved in. Phase 2 started (& almost completed!) a few months ago. Phase (end of 2) and 3 are going to be started soon. When you are the owners of a roofing/construction company, your things are always the a)last to be completed and b)almost always done in the fall/winter months.. So we patiently wait to complete our master bath & closet and the laundry room. As well as our deck out the back door...But the good news is our home is almost all complete and is at least 100% livable. One of the spaces, other than the laundry, that I have started decorating is our playroom...

play·room [pley-room] n. a room set aside for children's play.

When I think of a playroom, I think of toys, books, a child's size table & chairs...tv, movies, art supplies, pretend area...you know a playroom! So I knew right away that I wanted it to be colorful, happy and bright. I wanted to have plenty of children's things but I also wanted the adults to be able to utilize the space. At first when we put our furniture in there, it screamed boring...brown...and just plan blah. (wood floors, tan walls, tan couch, brown chair, wood buffet, you get the idea, Brownsville!) It did not feel like a playroom at all. Then I decided, well I could add colorful pillows, some shelves with colorful accents on them and toys.

It kind of started when I found this little teal vase at michael's...then I found these glass bottles at hobby lobby and I thought well I will buy them, all else fails I will return it if I don't start to find fabric and such to go with it. Then I found some fabrics at hobby lobby and decided they would be the pillows. I just ran with this teal, pinks, multicolored setting. By now, you might start to gather that I am drawn to pinks, tiffany blue, teals, pastels, etc...and I have to say you are right. I can't help it...these tend to be my "colors". It hasn't always been this way though! Our first home when we got married was actually a grey sectional & black accented furniture, with black & white pictures and Marilyn Monroe everywhere...then I soon discovered that black furniture and 2 little dogs that shed white hair, do not mix. It wasn't exactly my plan to dust e v e r y single day!! So I decided after we moved, our next home would not have black furniture. I decided to take my love of creams, whites & tans with splashes of color, outside of the bedroom and into the "main" parts of the house.

So here we are today! The playroom is in the middle of its finishing (decor) touches. You'll see that I lack storage for the toys (I have been on the hunt for the perfect baskets or containers to put on the buffet to hold them) as well as, we need some more trinkets (or something!) for the shelves on the wall and on top of the buffet. I also want to do some abc artwork or something for the other wall (the one with the large picture on it) and/or we are considering some built-ins and a desk...but for the most part you can see which direction it is going. Oh and that would be my little assistant sneaking in some of the pics... :D


{fabric details}
front pillow fabric (multi): brother sister designs fabric
pillow in the back: leopard print


{fabric details cont'd}
teal fabric: solid teal fabric


{bottle details}

So there you have it, our playroom. Hope you enjoy it, find some inspiration or spark a new creative idea for your own home or space!

Until next blog!

8.16.2011

dirty laundry

We have a couple of rooms in the house left to finish on our list: 1)being the laundry room 2)being the master bath & closet.

I've started adding some decor to the laundry room because all it lacks are the cabinets and the sink..Now for a laundry room you can really go for whatever look you want. It's one of those spaces in your home where not everyone is going to see it, but it is where you will be spending a lot of time. So you might as well have a fun, enjoyable space to work in!

For me, my inspiration came from my washer & dryer. I fell in love with them the very first time I laid my eyes on them. That's right, love at first sight does exist! Now I realize not everyone is going to have a colorful teal W&D that can set the decor in motion, and that's okay! If your W&D are a neutral color, you can really go in any direction you wish. But for me, I went for a look that involved jewel tones because of the teal...

I will do a followup when it is complete because I have it all envisioned and planned. I just have to wait for the cabinet and sink to be able to complete my look! But here is what I have so far...


{the details}

1) curtain- multi pattern stripe fabric: sewn by none other than little o' me! ((sewing is a new adventure/hobby I am currently learning and enjoying I might add!))
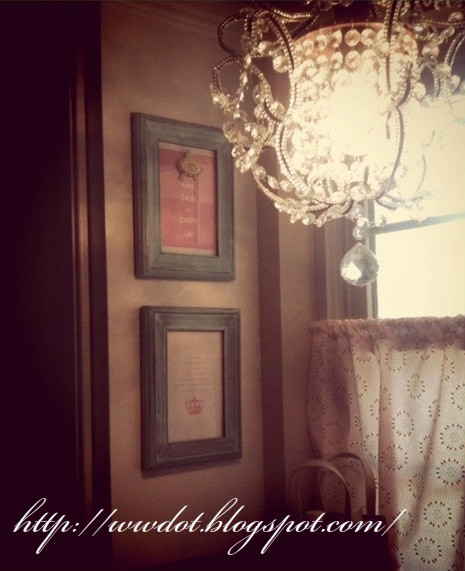
2) vintage laundry prints- frames from: a)pink 5X7 baroque style frames and b) teal 5X7 recatangles
3) chandelier-((the key to making laundry time more enjoyable, I promise!!)) If you haven't tried placing chandeliers anywhere other than above a dining room table, I challenge you to give it a try...they spark a little happiness and a touch of glamour to any space! Other places you will find them in our house: over the kitchen sink, dining table, master closet, entry, laundry, & nursery..I would probably put them in every single space in the house but I realize it might be a little much :D And don't let a chandelier intimidate you, not all of them are expensive. Shop around, check places like lowes, home depot or garbe's...or even online. You can find fabulous chandeliers that aren't too gaudy or expensive, so don't let that discourage you either. I know some people think chandelier=gaudy or expensive but it really doesn't!

So that's where our laundry room stands right now! I can not wait to finish the look and have it all complete. But for now you can find me washing our dirty laundry under the glow of a chandelier darling!

Until next blog!

8.11.2011

DIY or BUY?

Recent Kitchen DIY...

Sometimes I just can't seem to find the perfect things for my home decor...I search and search finding some things that might work, but never truly finding the perfect thing that I am looking for or that seems to fit. I'm not picky where I look either...it can be anywhere from pottery barn, target, hobby lobby...tj maxx, anywhere. I'm just in the search for certain things that I just can't seem to find. Then I was fabric shopping, of all things, and had a light bulb moment...I'll just DIY! All else fails, stop searching for what you are looking for and make it! Just go for it! Not only will it be exactly what you were looking for, but you will have a sense of pride because you made it and you can't buy that anywhere :D


These are hanging in my kitchen! Above the sink, on the end of our cabinets. I bought 2 (5x7) picture frames (50% off @ Joann's) Acrylic Paint (@ Michael's for .99) and made the two pictures in Word. In the top one (Keep Calm & Carry On) I embellished it after the fact with a cute crown sticker I found in my scrapbook stuff!

DIY, Cute, Personal & Inspirational when I'm in the kitchen! Now go make what you are looking for, it may just be hiding inside you, not on a shelf at the store.

Until next blog!